How to follow the beat of a live recording

'llo all...
You know quite well that we've been numerous to ask this confounded question: "How to do to make Cubase SX to follow the flucutuating beat of a live recording made without a metronome?". Eh? How? Ladies and gentlemen, today is THE day. You can kiss my feet, anoint my long Christlike hair, etc. In short, you can call me God, bicozzzz... Today, I can tell you, Man won against machine, because Man at last found the solution ;0)
Explanations
It is not as simple as in VST, but it works. To be simple, it has to do with using the "Beat Calculator" on small sections of the live recording. It is fastidious (because less automatic than before), but the game is worth the candle. If the beat variations are not too important, you can "cut" your file in 2 or 3 measures sections, but not more, or else this will be more difficult later. You can possibly make 1 measure selections when the beat changes more. When I say "cut", it is a way of talking, since it is actually making selections on the file in the Sample Editor you can acces by double-clicking on the audio event in the Project window.
Are you ready ?
Yeah ? Well, it will take you one or two hours of work, especially if you are the new "Dream Theater" you chose the longer and more involved song you've ever written. Let's take a Thermos® flask of coffee (or whatever you want, eh, I don't mind), you will need it... Got it? Ready ? You'd better to, 'cause there it goes harder...
Before importing your Audio file "Live in Themiddleofnowhere" in Cubase, you will have taken the time to find a medium beat by listening to your work in the media player of your choice, thanks to an adequate tool such as a metronome (Who said: "Wat's that ?") or as what you want (I don't mind, eh). If your song contains metric and/or tempo changes (planned this time), take as reference the first part, before the changes. Once done, create a new project with your medium beat as basic beat, and import your "Live in Themiddleofnowhere" in it. The aim will be to make Cubase understand where in the file it will have to accelerate or slow down.
Her we are, the live is imported on an audio
track. Well, you can now double click on your file to open the Sample
Editor. There will be the biggest part of the manual work. The first
thing to do is to lock the track AND the audio event. For the track
it is the small locker ![]() =>
=> ![]() , for the event, it is the Edit menu / Lock
after having selected the event (also available by right clicking). Right
click on the event again, Edit / Lock, and here is what you
whould see.
, for the event, it is the Edit menu / Lock
after having selected the event (also available by right clicking). Right
click on the event again, Edit / Lock, and here is what you
whould see.

Tick off "Others Locked". It is obvious you will have put the beginning of the audio fil on a project measure before.
Return to the Sample Editor Window,
and click on the first tool on the left ![]() , the Loop mode
, the Loop mode ![]() and the "Snap to Zero Crossing"
and the "Snap to Zero Crossing" ![]() .
.
Open the Tempo track, in the Project menu
or Ctrl-T, in which you will activate (if it is not done yet) the
Master button and and unactivate the Snap button ![]() .
.
Open the Beat Calculator you will find in the Project menu and look closer how it is done. It has some parameters that you could possibly need to modify, for example if your song has metric changes (4/4, 5/4, 6/8 etc.). But now, we will especially use the Refresh and At Tempo Track Start buttons.
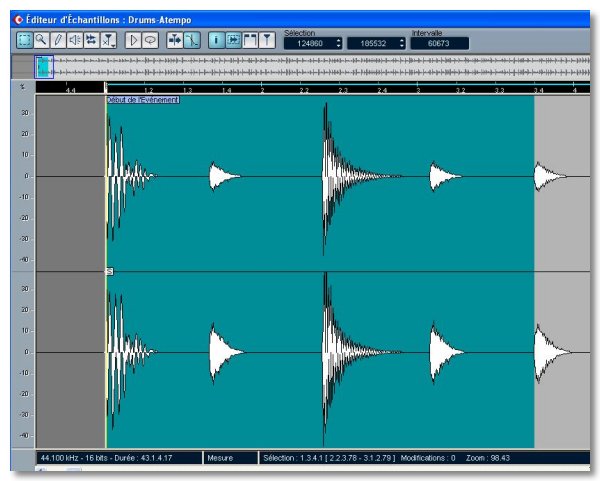
Let's say you only make "Good Old Rock in 4/4", it will be easier for a first try to use a live based on this measure. If your live directly begins, that is to say without "no man's land" synthesizer in intro (beuark!), it will be better. So, in the Sample Editor, select the four first beats.

Push play ![]() ,
and verify by hearing that your selection is correct and perfectly corresponds
to four full beats, a real loop ;o). If it doesn't fit, adjust with the
mouse by taking the right of left limits of the selsection (the mouse
changes into a horizontal double arrow). Later on, you should only have
to modify the right limit.
,
and verify by hearing that your selection is correct and perfectly corresponds
to four full beats, a real loop ;o). If it doesn't fit, adjust with the
mouse by taking the right of left limits of the selsection (the mouse
changes into a horizontal double arrow). Later on, you should only have
to modify the right limit.
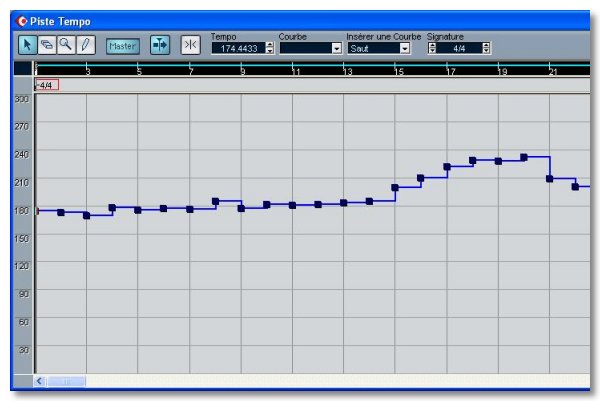
In the Beat Calculator, choose the number of beats contained in your selection (4 here) and click on "Refresh" in order to the new selection be taken into account. The Beat Calculator should now indicate a beat value depending on the length of your selection and the number of beats you indicated. If this value seems coherent, click on "At Tempo Track Start". Take a look at the Tempo Track editor... Miracle... A new tempo change point now appears in a position which corresponds to your selection in the Audio file.
You surely understood what happens next ;op. So...
To keep the tempo changes homogenic, take the left limit of your first selection and put it on the first beat of the next measure. Depending on the quality of your file, it can be relatively easy because hard beats are often marked by peak in the Audio file image. If it is not the case, be patient and concentrate, because you can "miss" the left limit which "cancels" the selection, and makes you lose the marker represented by the right limit for the next measure positioning :o(. My advice is to let the loop playing during the operations, it is easier to prop up the selection. After every selection, do it again: Click on "Refresh", then on "At Tempo Track Start" in the beat calculator. Little by little, a curve will draw in the Tempo Track Editor.

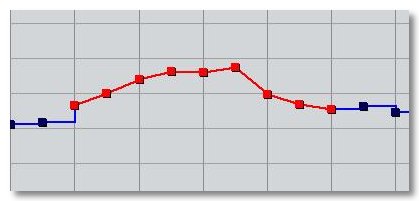
You can possibly smooth this curve by selecting the points and choosing "Ramp" in the "Curve" menu in the Tempo Track Editor. But be careful, this mode doesn't replace the level by a curve, but by a straight line between each point.

That also means that the tempo changes from a point to the next will be progressive, which can be not relevant for your song.
If you want to be more precise, you will have to divide your selections into two (i.e. two beats instead of four) and think to change the number of beats in the beat calculator.
You can now close the Sample Editor, the Tempo Track Editor and the Beat Calculator, activate the metronome (C on the keyboard) and verify the homogeneity of your work by listening to the click following the variations of your magisterial "Live in Themiddleofnowhere".
Finally...
Here it is, it is not as simple as the "Timehits" of the previous Cubase versions that some of you have known, but it is for the moment the only way I found in Cubase SX to get the same result. Let's bet Uncle Charlie will soon give us this function back, because it only can be a forgetting, isn't it Charlie ?
- "What do you say about that, Bosley ?"
- "All right, girls..."


